Frontend Integration Guideline
Javascript Integration Guideline
1. Get your public & private key from mycybersiara.com
Note: Use public key "TEST-CYBERSIARA " for staging/development.
2. Copy the code in <head > tag.
<meta http-equiv = "Content-Type" content = "text/html; charset=UTF-8" /> <script src = "https://ajax.googleapis.com/ajax/libs/jquery/3.3.1/jquery.min.js" ></script> <script src = "https://embedcdn.mycybersiara.com/captchaformate/CaptchaResources.js" ></script>
3. Put the below code where you want to load the captcha plugin in <body > tag.Replace 'YOUR-PUBLIC-KEY-HERE'; with your public key.
<div class = "SiaraShield" ></div> <script type = "text/javascript"> $ ( function () { var PublicKey = 'YOUR-PUBLIC-KEY-HERE'; InitCaptcha (PublicKey); $ ( '.CaptchaSubmit' ) .click (function (){ if( CheckCaptcha()){ (CyberSiaraToken); } }); }); </script>
Note: Please put your submit button code inside if(CheckCaptcha())
4. Add ‘CaptchaSubmit’ class in your submit button
<button class = "CaptchaSubmit" ></button>
5. Once all these steps are done, go to your browser and refresh the page and enjoy the SiaraShield . Thank you for using SiaraShield!
Frontend Integration Guideline
WordPress Integration Guideline
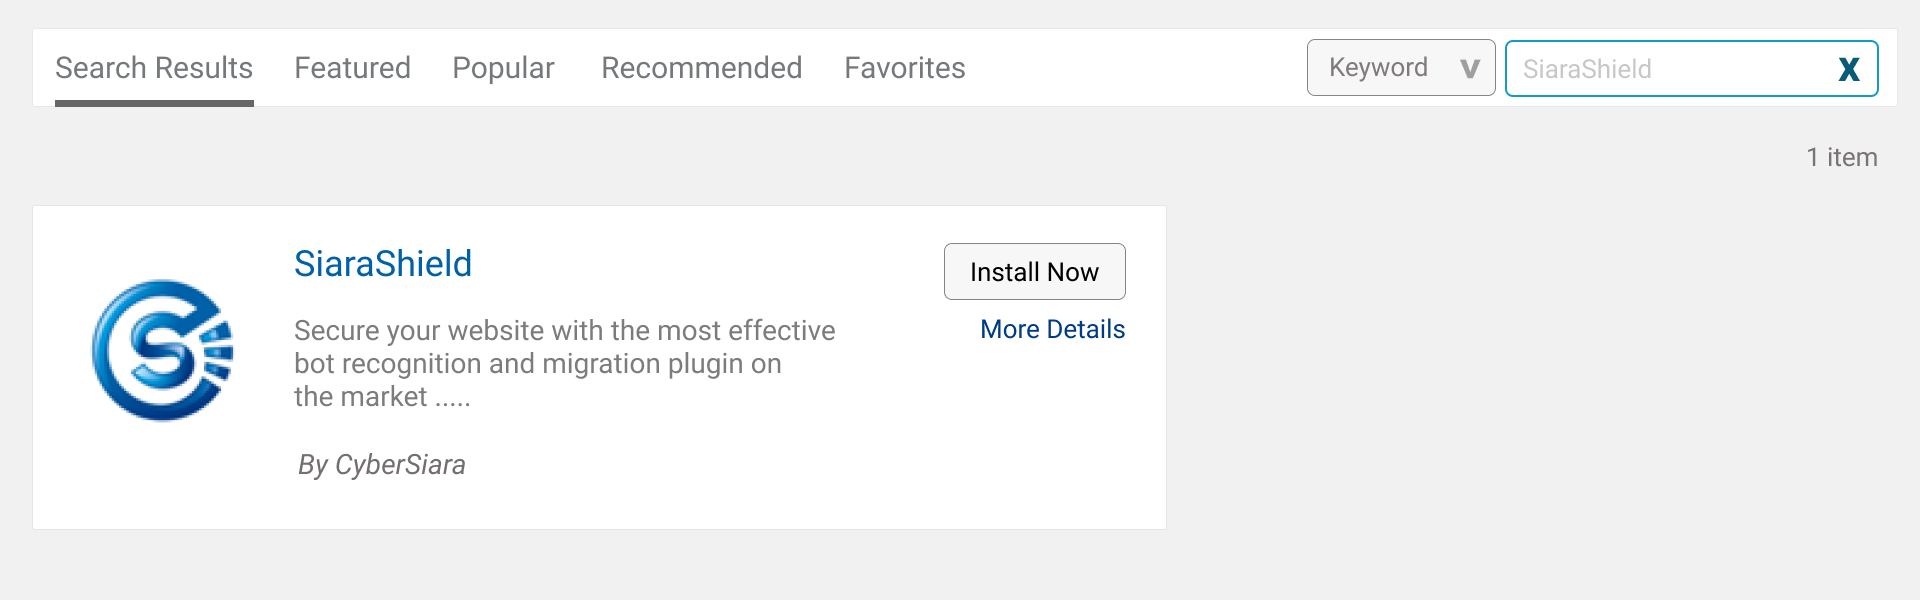
1. Download plugging from WordPress or go to WordPress admin panel of your project and search for SiaraShield .
2. Click install now, and activate your plugging
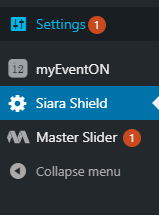
3. Click on SiaraShield plugging
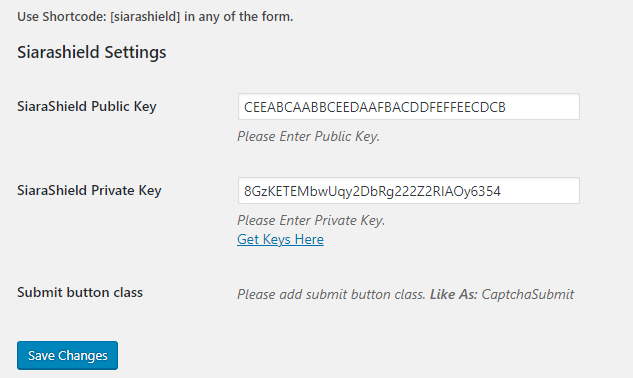
4. Once you clicked on SiaraShield plugging you need to add Public and Private key, You will get Public and Private key from mycybersiara.com
5. Add your Public & Private key then click Save Changes button.
6. Once you entered your Public and Private then go to your contact form or any other form you want to install SiaraShield on.
7. Edit your contact form and add [siarashield] where you want to display SiaraShield plugin within your page.
<P> Message <P> <P> [siarashield] <P> <noscript style = "text-align: initial;"> <span class = "jsDesable" > </span> </noscript> <P> submit class : btn2 class : CaptchaSubmit "Submit" <P>
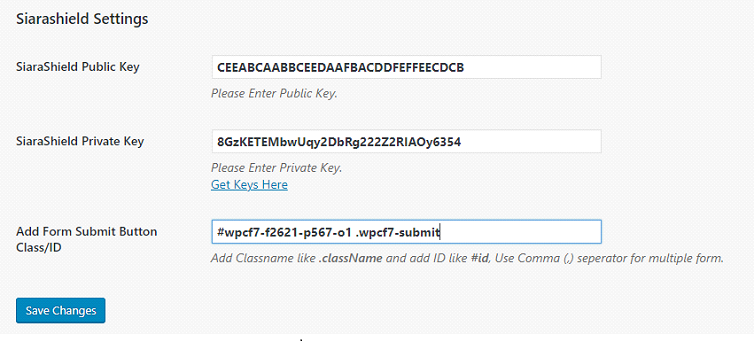
8. Please add class="CaptchaSubmit" inside your submit button and click on Save button.
submit class : btn2 class : CaptchaSubmit "Submit"
9. Once all the above steps are done, go to your browser and refresh the page.
Frontend Integration Guideline
Vue.js Integration Guideline
1. Download two files CaptchaResource.vue and CaptchaResourceVue.js from the here
2. Go to your project and you will find the package.json file on the root directory. Copy the below text and paste in package.json file.
Example: "public_key”: "Enter your public key".
Note: You can get the Public_Key by registering your live domain at mycybersiara.com “TEST-CYBERSIARA” as your Public key.
"Public-Key" : "Enter Your public key ",
3. Copy two files CaptchaResource.vue and CaptchaResourceVue.js paste into your project root directory.
4. Before implementing SiaraShield, you need to import the CaptchaResource.vue file into your contact-us file or any other form into the script section.
Example: import CaptchaResource from './CaptchaResource.vue';
<script> import "CaptchaResource" from './CaptchaResource.vue' </script>
5. Once you import the CaptchaResource.vue file then you will need to add components in your contact-us file or any other form into the script section.
Note: If you already have components no need to add again.
export default { components : { CaptchaResource } }
6. Now you need to add one tag into your “contact-us” form wherever you want to display the SiaraShield plugin.
Example: <CaptchaResource></CaptchaResource>
<CaptchaResource> < /CaptchaResource >
7. Once all these steps are done, go to your browser and refresh the page. Thank you for using SiaraShield!
Frontend Integration Guideline
Angular Integration Guideline
1. Get your public & private key from mycybersiara.com
Note: Use public key "TEST-CYBERSIARA " for staging/development.
2. Copy the code in <head > tag.
<meta http-equiv = "Content-Type" content = "text/html; charset=UTF-8" /> <script src = "https://ajax.googleapis.com/ajax/libs/jquery/3.3.1/jquery.min.js" ></script> <script src = "https://embedcdn.mycybersiara.com/captchaformate/CaptchaResources.js" ></script>
3. Put the below code where you want to load the captcha plugin in <body > tag.Replace 'YOUR-PUBLIC-KEY-HERE'; with your public key.
<div class = "SiaraShield" ></div> <script type = "text/javascript"> $ ( function () { var PublicKey = 'YOUR-PUBLIC-KEY-HERE'; initCaptcha (PublicKey); $ ( '.CaptchaSubmit' ) .click (function (){ if( CheckCaptcha()){ (CyberSiaraToken); } }); }); </script>
Note: Please put your submit button code inside if(CheckCaptcha())
4. Add ‘CaptchaSubmit’ class in your submit button
<button class = "CaptchaSubmit" ></button>
5. Once all these steps are done, go to your browser and refresh the page and enjoy the SiaraShield . Thank you for using SiaraShield!
Backend Integration Guideline
Laravel Integration Guideline
1. Go to Resources >Views folder where your site is hosted in your server.
2. Open .php in which you are processing the input where you have added cybersiara captcha.
3. Download the SiaraShieldToeknValidationHelper.php file from here
4. Go to App>Http>Controllers and open the Controller where you are processing your form.
5. Add use App\Helpers\SiaraShieldToeknValidationHelper; In that file at top.
use App\Helpers\SiaraShieldToeknValidationHelper;
6. Get your public & private key from mycybersiara.com
Note: Use private key "TEST-CYBERSIARA " for staging/development.
7. Copy the code below before processing the request. Add your private key in “YOUR-PRIVATE-KEY”
if $request -> input ('CyberSiaraToken')! = null || $request ->input ->('CyberSiaraToken')! !=''){ $result = SiaraShieldToeknValidationHelper :: ValidateToken 'TEST-CYBERSIARA',$request->input('CyberSiaraToken')); if ($result=='true') { //Your submit button code here // } } else{ $result = SiaraShieldToeknValidationHelper::ValidateToken('TEST-CYBERSIARA','invalidtoken'); }
8. Once all these steps are done, go to your browser and refresh the page and enjoy the SiaraShield. Thank you for using SiaraShield!
Backend Integration Guideline
PHP Integration Guideline
1. Go to public_html folder where your site is hosted in your server.
2. Open .php file in which you are processing the input where you have added cybersiara captcha.
3. Download the SiaraShield.php file from here
4. Add require('SiaraShield.php'); In that file at top.
require ('SiaraShield.php ');
5. Get your public & private key from mycybersiara.com
Note: Use private key "TEST-CYBERSIARA " for staging/development.
6. Copy the code below before processing the request. Add your private key in “YOUR-PRIVATE-KEY”
if ( isset ( $_POST [ "CyberSiaraToken" ] && $_POST [ "CyberSiaraToken" ])) { if ( ValidateToken ( 'YOUR-PRIVATE-KEY-HERE' , $_POST [ "CyberSiaraToken" ])) { //Your submit button code here // } }
7. Once all these steps are done, go to your browser and refresh the page and enjoy the SiaraShield. Thank you for using SiaraShield!
Backend Integration Guideline
Java Integration Guideline
1. Download the CyberSiara.jar file from here
2. Right click project and select Manage your referance to jar file.
3. Get your Public and Private key from mycybersiara.com
Note: Use private key "TEST-CYBERSIARA " for staging/development.
4. Add namespace CyberSiARA;
5. Copy the code below before processing the request. Add your Private Key in “YOUR-PRIVATE-KEY”.
var token = Request.Form ["CyberSiaraToken"]; var result = false ; Task.Run(async () => { result = await new CyberSiaraValidator(). ValidateTokenAsync( "YOUR-PRIVATE-KEY", token); if (result) { //Place the submit button code here } });.ConfigureAwait (true);
6. Once all these steps are done, go to your browser and refresh the page and your SiaraShield™ plugin should now appear on your web page.